The Perfect Step-by-Step Guide to Create a Kubernetes Cluster on Linux VMs
Published on
by

This article will guide you how to create a Kubernetes Cluster on VM (Virtual Machines). This configuration is advantageous for establishing a physical Kubernetes cluster on your virtual machines. In this scenario, there will be one Master Node and one Worker Node on separate Ubuntu servers.
Let’s Learn How To Create Kubernetes Cluster!
Step 1 – Set hostname on each Node
1. Login to Master Node server and set hostname using hostnamectl command
$ sudo hostnamectl set-hostname "k8smaster.example.net"
$ exec bash
2. On the Worker Nodes, run below commands
//This is for 1st Worker node
$ sudo hostnamectl set-hostname "k8sworker1.example.net"
//This is for 2nd Worker node
$ sudo hostnamectl set-hostname "k8sworker2.example.net"
$ exec bash
Step 2 – Map Hostnames to IP Addresses in /etc/hosts file
1. Get Private Ips of the server
$ sudo apt update -y
$ sudo apt install net-tools -y
$ ifconfig
Take private ip address from above command and proceed to next step
2. Open the file using below command
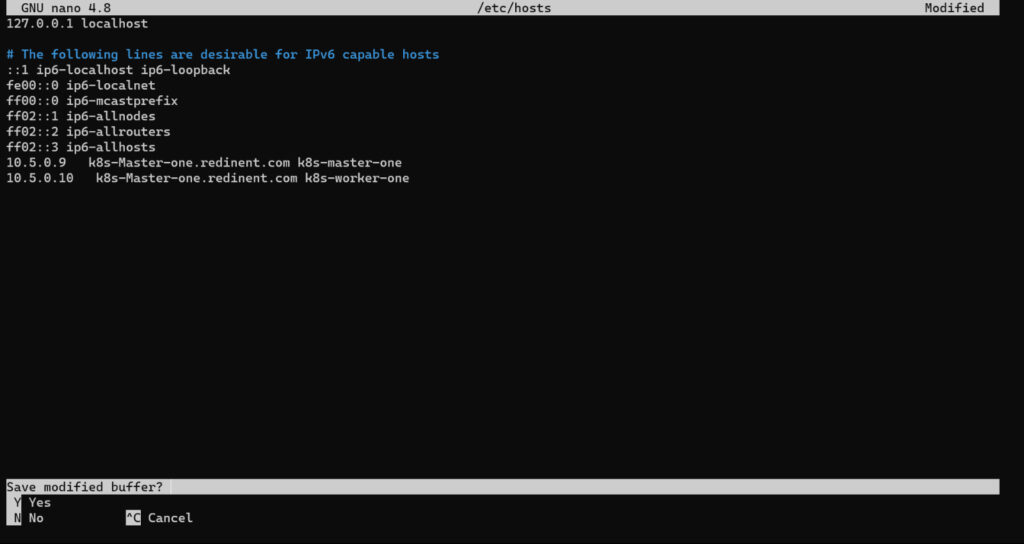
$ sudo nano /etc/hosts
3 – Add the below entries in opened file ( /etc/hosts) in last step
Example – <Server_private_IP_address> <hostname1>
192.168.1.xx k8smaster.example.net k8smaster
192.168.1.xx k8sworker1.example.net k8sworker1
192.168.1.xx k8sworker2.example.net k8sworker2

Save & Close the file (/etc/hosts).
Keep reading to learn more about our Kubernetes Consulting.
Step 3 – Installing Docker, Kubectl, And Kubeadm Packages
In order to install above packages, follow the steps mentioned below on Master as well as Worker Nodes
1. Disable swap & Add kernel Parameters
$ sudo swapoff -a
$ sudo sed -i '/ swap / s/^\(.*\)$/#\1/g' /etc/fstab
2. Configure persistent loading of kernel modules
$ sudo tee /etc/modules-load.d/containerd.conf <<EOF
overlay
br_netfilter
EOF
3. Load at runtime
$ sudo modprobe overlay
$ sudo modprobe br_netfilter
4. Update Iptables Settings
$ sudo tee /etc/sysctl.d/kubernetes.conf <<EOT
net.bridge.bridge-nf-call-ip6tables = 1
net.bridge.bridge-nf-call-iptables = 1
net.ipv4.ip_forward = 1
EOT
5. Reload the above changes with below command.
$ sudo sysctl --system
6. Installing docker
$ sudo apt install docker.io -y
$ sudo systemctl start docker
$ sudo systemctl enable docker
7. Add Apt Repository for Kubernetes
$ sudo apt-get update
$ sudo apt-get install -y apt-transport-https ca-certificates curl software-properties-common
$ curl -s https://packages.cloud.google.com/apt/doc/apt-key.gpg | sudo gpg --dearmour -o /etc/apt/trusted.gpg.d/kubernetes-xenial.gpg
$ sudo apt-add-repository "deb http://apt.kubernetes.io/ kubernetes-xenial main"
8. Install Kubectl, Kubeadm and Kubelet
$ sudo apt update
$ apt list -a kubeadm
$ sudo apt install -y kubeadm kubelet kubectl
$ sudo apt-mark hold kubelet kubeadm kubectl
Step 4 – Follow below steps on Master Node
1. Install Kubernetes Cluster on Ubuntu server
$ sudo kubeadm init
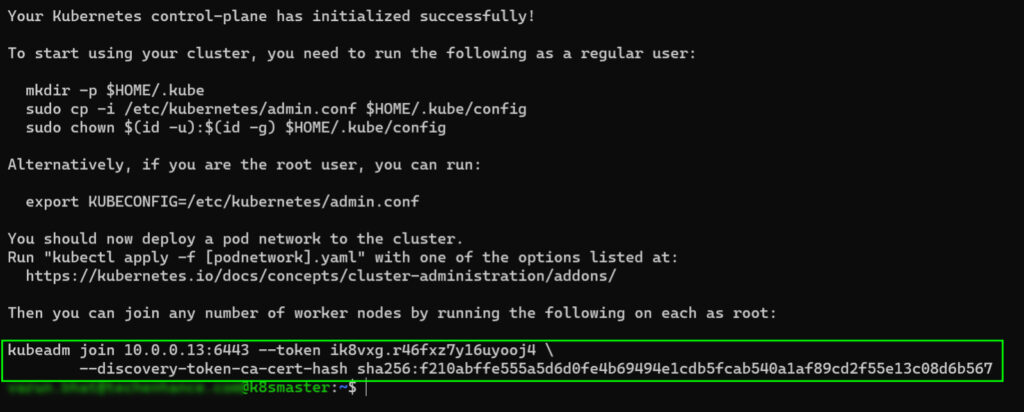
Note: After the initialization is complete, you will see a message with instructions on how to join Worker Nodes to the cluster. Make a note of the kubeadm join command for future reference.

If you forgot the token then use below command (follow below screenshot also) to create a new token.
$ kubeadm token create --print-join-command
![]()
2. To start interacting with cluster, run following commands on the Master Node,
$ mkdir -p $HOME/.kube
$ sudo cp -i /etc/kubernetes/admin.conf $HOME/.kube/config
$ sudo chown $(id -u):$(id -g) $HOME/.kube/config
3. Install Calico Network Plugin (A network plugin is required to enable communication between pods in the cluster)
$ kubectl apply -f https://raw.githubusercontent.com/projectcalico/calico/v3.26.0/manifests/calico.yaml
Step 5 – Follow below steps on Worker Nodes
Join Worker Nodes to the Cluster. On each Worker Node, use the kubeadm join command you noted down earlier after initializing the Master Node
$ sudo kubeadm join 10.5.0.7:6443 --token 2slaav.qpcu7ivjrvs4qe9a --discovery-token-ca-cert-hash sha256:16aa5830fc58f0b46c9327752972d0a015b62f56c3e62857b337d7f94274a319
Now K8 cluster will be installed. Also Master and Worker Node will be communicating with each other.
Step 6 – Verify the Node status (Execute below commands in Master Node only)
$ kubectl get nodes

Step 7 – Verify the status of pods in kube-system namespace (Execute below commands in Master Node only),
$ kubectl get pods -n kube-system

You can get in touch with our DevOps Consultants at TechEnhance, and we will help you transition smoothly. If you need more help understanding Kubernetes, book a free call with us anytime!